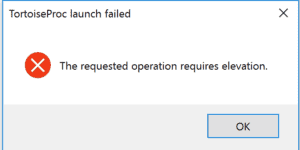
ERROR_ELEVATION_REQUIRED error message indicates, you can only gain access to or take ownership of the file/folder by getting the elevated permission of a local administrator. So, to resolve the problem, you need to change the ownership of the drive. If you encountered the issue while trying to run an app, you can configure its properties to launch it as an administrator. Keep reading this post to learn how to fix ‘The requested operation requires elevation’ issue on Windows 10.
Solution 1: Take Ownership of the Hard Drive
- Log out of your user account.
- Log into the administrator account.
- On your keyboard, press Windows Key+E. Doing so will launch File Explorer.
- On the left-pane menu, click This PC.
- Now, go to the right pane and right-click your hard drive.
- Select Properties from the context menu.
- Once the Properties window shows up, go to the Security tab.
- Click the Advanced button.
- On the Advanced Security Settings window, click the Owner tab.
- Click the Edit button.
- Select the user you wish to set as the owner of the drive.
- Make sure that the ‘Replace owner on subcontainers and objects’ option is selected.
- Save the changes you made by clicking Apply and OK.
Solution 2: Run the App as an Administrator
You may encounter the error message (ERROR_ELEVATION_REQUIRED) when opening an app which requires administrative privileges. In this case, you need to configure the app’s settings to let you open it as an administrator all the time. Here are the steps:
- Right-click the app, then select Properties from the options.
- Now, go to the Compatibility tab.
- Select the box which says, ‘Run this program as an administrator’.
- Save the changes you made by clicking Apply and OK.
Solution 3: Disabling UAC
It is possible that you’re getting the error message ERROR_ELEVATION_REQUIRED (740) because of the User Account Control (UAC) settings. So, you can try disabling UAC to know if it is the culprit. To begin, follow the instructions below:
- Press Windows Key+S on your keyboard.
- Inside the Search box, type “Change user account control settings” (no quotes), then hit Enter.
- Now, drag the blue bar down to the ‘Never notify’ option.
- Save the changes you made by clicking OK.